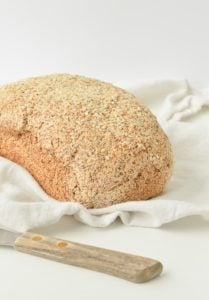
Best Keto Bread Recipe Without Eggs
www.sweetashoney.coThe best keto bread recipe with coconut flour but without eggs!
Servings: 14 slices
Net Carbs: 3.6g
Calories: 68kcal
Ingredients
Dry ingredients
- 4.3 oz Coconut Flour scoop and level method (or 1 cup)
- 2.1 oz Almond Flour (or 1/2 cup)
- 0.95 oz Whole Psyllium Husk (or 1/3 cup)
- 0.91 oz Chia Seeds (or 2 tablespoons)
- 2 teaspoons Baking Powder or 1 teaspoon baking soda
- ½ teaspoon Salt
Liquid ingredients
- 2 ¼ cups Lukewarm Water 18.9 fl.oz
- 2 teaspoons Apple Cider Vinegar
Instructions
- Preheat oven 350°F (180°C), fan mode works the best and faster. Otherwise, use conventional baking mode. Line a 9-inch x 5-inch loaf pan with parchment paper. Set aside.
- Measure all your ingredients carefully before you start. I highly recommend weighing your ingredients in grams or oz for precision rather than cups. If you use cups, make sure they are packed, leveled up using flour with no lumps.
- In a large mixing bowl, whisk together all the dry ingredients.
- Add apple cider vinegar and lukewarm water (think hot bath temperature, cold water won't activate the fiber in the flour, and the ingredients won't bind)0
- Combine with a spoon at first. It will be very liquid and will dry out as you go. After 30 seconds, the dough is moist, not liquid, and slightly crumbles apart. Knead the dough, press/squeeze with your hands for at least 1 minute, or until you can form a ball.
- Form a dough ball and set it aside on the benchtop for 10 minutes to let the fiber absorb all the water and hold the ingredients together.
- Now the dough should be soft, elastic, and slightly moist but should hold perfectly together. Shape a cylinder, bread loaf shape. Don't press the dough too much. It's a gluten-free loaf, it won't rise, and the shape you give will be the shape you get. If you press too much, it will be very dense, doughy.
- Another option is to shape 14 small buns to make bread rolls. If so, bake on a cookie sheet covered with parchment paper. It will bake faster - only 35 minutes on the bottom rack.
- Place the loaf onto the prepared loaf pan covered with parchment paper.
- If cracks appear on top, wet your fingers with water and massage the top of the bread to fix cracks. Sprinkle 1 tablespoon of sesame seeds or poppy seeds to decorate (optional).
- Bake on the bottom rack of the oven (first rack from the bottom) for 45 minutes then switch to the middle rack for 15 extra minutes. You can add a piece of foil paper on top of the loaf if the color gets too brown.
- Insert a skewer in the middle of the bread to check the texture. It should come out dry with no or very few crumbs on it.
- Remove from the oven and cool on a rack for 4 hours or overnight before slicing.
How to serve
- The texture is dense, soft, and can be slightly packed or moist at the bottom if you press the dough too much or your husk is too thick (change brand next time for a better result!). If so, toast the bread slices to add some crispiness and dry out. Otherwise, serve directly as a sandwich bread with butter, avocado, spinach, lettuce, chicken, or cheese.
Storage
- Store up to 3 days in the pantry or fridge. Slice when needed to keep the bread moist.
- Slice into 14 slices and freeze the slices in a zip lock bag.
- Defrost the day before and toast before using it.
Video
Notes
Net carbs per slice: 3.6g for 14 slices in the loaf (9 inches x 5 inches).
Psyllium husk: don't use Metamucil fiber supplements in this recipe. It's not the same product as whole psyllium husk fiber. Metamucil is a husk powder that is not suitable for baking keto bread. It will turn food dry, purple, or blue.
Troubleshooting?
- Bread is undercooked/too doughy: read the blog post above to see why this happens.
My Notes
To save your own private notes on your favorite recipes, join Sweetashoney Members!
Nutrition
Nutrition Facts
Best Keto Bread Recipe Without Eggs
Amount Per Serving (1 slice)
Calories 68
Calories from Fat 19
% Daily Value*
Fat 2.1g3%
Carbohydrates 7.2g2%
Fiber 3.6g15%
Sugar 1.9g2%
Protein 2.6g5%
Net Carbs 3.6g
* Percent Daily Values are based on a 2000 calorie diet.